Do It Yourself : Heart Jeans
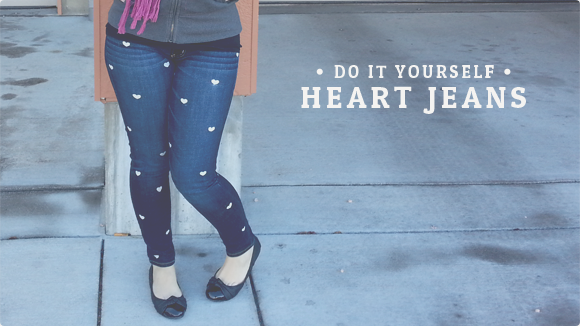 It seems to be quite the popular thing these days to have patterned jeans... but seriously, why would I pay for patterned jeans when I have a ton of jeans just kind of hanging out in my closet? Then two Fridays ago I found a do-it-yourself for the cutest heart jeans ever!So without fail and I ran down to Michaels, grabbed from fabric paint and went to work to make my own heart patterned jeans from a pair of jeans sitting in my own closet. I am actually quite proud of how I jumped on the project and then actually did it to completion within a day of purchasing the new fabric paint. It helps that I was super motivated to get them done before the Valentine season got in full swing. :DI particularly love to throw these on with one of my super simple weekends outfits of a tshirt and sweater to add a little more fun to my outfit. I have yet to wear them to work... cause I'm not sure how professional I would look even with my office's very realaxed dress code. :)
Supplies:
one // pair of skinny jeanstwo // fabric paintthree // chalk*four // fabric washable pencil*five // rulersix // cardboardseven // scissorseight // super thick card stock**nine // triangle makeup spongesten // pencileleven // paint dish* you may use one or the other... I prefered the chalk. I'll explain why later.** you may need a couple pieces too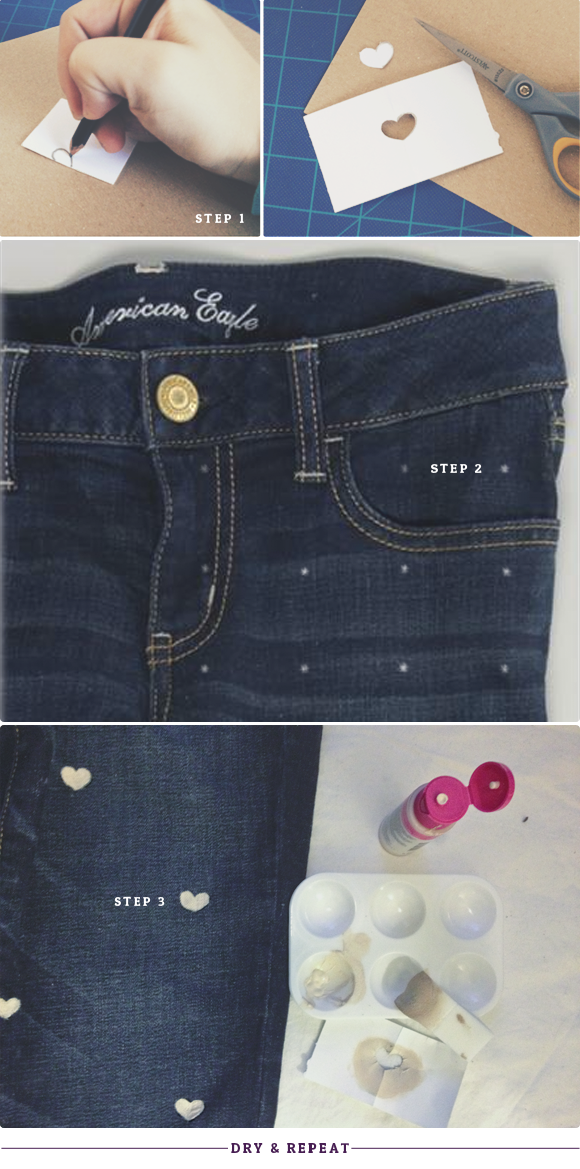
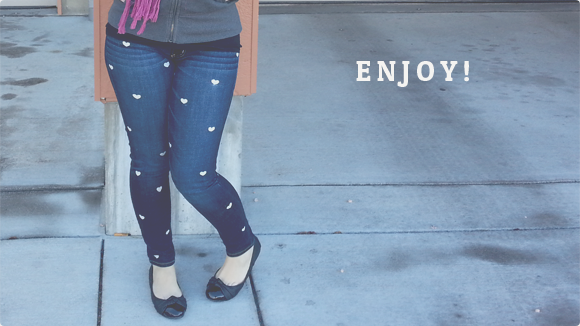 Step 1 : Fold your piece of card stock (or pieces- which is preferable) in half and draw one half of a heart. You may draw a thick or thin heart (which ever is your preference) and cut out that half with the paper still folded in half. When you unfold it you will have a perfectly symmetrical little heart.This will become your stencil- and will get wet from the all paint. So once you find a heart shape that you love make a couple replicas so that when one of the 'stencils' starts to fall apart from all the paint you have your backups to keep going.Step 2 : Lay out your pants as flat as possible and grab your ruler and chalk (or fabric washable pencil) and measure out an one inch by one inch grid all over your pants. I personally liked the chalk better because it rubbed off easily with a tiny bit of water and was much easier to put onto the pants and really easy to see. I had a hard time seeing the washable fabric pencil.Step 3 : Start stamping away. Pour a little of your fabric paint (which ever color your selected- I went with 'linen' because I didn't want the hearts to be a harsh white and I thought it had a subtle pink hue to it), lay down your 'stencil' where you would like your heart to be and dab a little paint onto your makeup sponge. Keep in mind that if you want light, subtle hearts put less paint on your sponge and for stronger hearts apply several thicker layers of paint.I wasn't horribly strict about using the grid I exactly the way I drew it because I wanted it to look kind of carefree, but I still wanted it to be organized so it was nice to have a grid to work off. You may follow your grid as strictly or loosely as you would like.Step 4 : Once you have completely covered the front of your pants let them dry (I used a blow dryer to make them dry faster) then flip the jeans over and repeat steps 2-3.Step 5 : Once the back of your pants has been stamped completely and has dried completely (again I used a blow dryer)- turn your pants inside out and throw them in the dryer on high heat for about 30 minutes to an hour to really set the paint. :)Enjoy!